More interesting thoughts from Joseph. And what's best? You can contact him if you don't agree...;-) Paste the link if you don't receive the images/can't access the links.
http://www.marsanomalyresearch.com/evidence-reports/2009/172/spirit-rover-evidence.htm
Love and Light.
David
MORE SPIRIT ROVER EVIDENCE
Report #172
November 6, 2009
Joseph P. Skipper
J. P. Skipper can be contacted at: jskipper@marsanomalyresearch.com
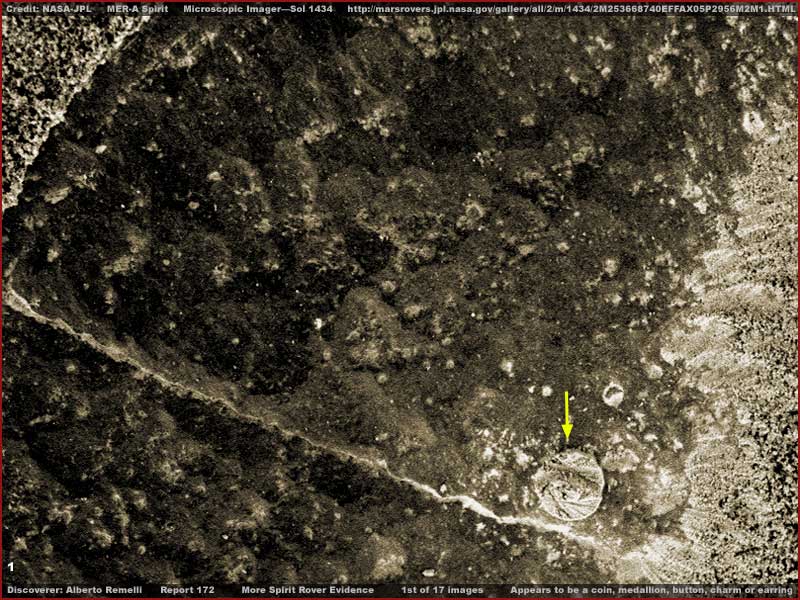
http://marsrovers.jpl.nasa.gov/gallery/all/2/m/1434/2M253668328EFFAX05P2936M2M1.HTML
The above large 1st image demonstrates a small shallow pit drilled in a rock via Spirit rover's onboard RAT (Rock Abrasion Tool) tool that is located on the rover's articulating arm as are the Mössbauer and alpha particle X-ray spectrometers that do geological testing associated with such drillings as well as the Microscopic imager that took this image. The most important anomalous evidence here is of course the obvious small round disk pointed with the yellow arrow.
As you can perhaps tell by the visuals here, it seems that the RAT was pressed down at an angle cutting a bit deeper on the left than on the right as the rounded cut line edge on the left is more defined in the rock than on the right. I mention this because the pit and the rock will both also be a bit of issue here and will be needing some attention as you will come to understand. Yes it would have been better if the above image offered a bit wider field of view showing more of the outer edges of the pit but the close in shots do not allow for this in any of the images. The shot here is taken from one side edge of the strip to the other side and encompasses all the visual available.
Before leaving this image and moving on, note the interior bottom of the shallow pit and its lumpy surface. Note that it looks possible that this may have been a bit of a hollow pocket uncovered by the RAT once the surface cover material was removed. The straight thin light color ridge line looks anomalous because it is so straight but it may be nothing more than an old fracture line that was filled in by fine sediment and then hardened in place in older times becoming harder than its softer surroundings. Now also take note of the rocky surface material on the right edge area and how it looks. We'll be getting into that a little later.
Also you should know that this object was brought to my attention for investigation by Alberto Remelli of Verona, Italy. Good work and well done Alberto.
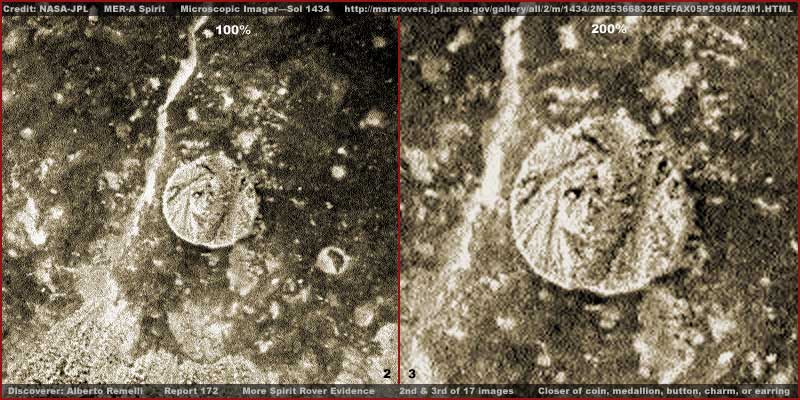
http://marsrovers.jpl.nasa.gov/gallery/all/2/m/1434/2M253668328EFFAX05P2936M2M1.HTML
As you can see in the above 2nd and 3rd split frame images providing closer views of the disk evidence only, the disk clearly appears to have a raised relief on the surface and a visage of something or someone represented there. You should know that the RAT cuts a nearly 5 cm or 2 inch wide pit as much as 5 mm or .2 inch deep and these images are from the close in Microscopic Imager. That means that this disk object is very small and likely smaller than a dime coin.
I suspect the RAT's metal cutter/grinding wheel kicked this object up out of its resting place in the matrix it was embedded in. In the process, the object was likely damaged and defaced even as the rotating RAT brushes partially cleaned its surface. In the upper right area of the disk, you can see what appear to be cut marks on the disk's edge. This likely continued down vertically across the disk face damaging it.
Remember that the RAT cutter is designed to cut through hard rock in a clockwise rotation and so this object would not likely escape some defacement and some matrix is likely still sticking to the object. On the other hand, note that the object would likely have come to a quick rest when it was carried to the right drill area where the RAT was cocked upward and dropped downward away from the cutter.
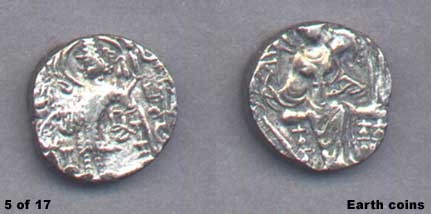
This may in fact be a small coin, a medallion, a button, a small charm, or even an earring. This is obvious the front and we can't see the back of it to check for attachment points. Take a look at the following EARTH ancient coins for a design comparison.
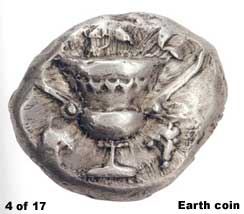 ,.
,. 
http://www.greek-islands.us/ancient-greek-coins/naxos-coins ...................... http://www.ancient-art.com/east.htm

http://buttonsthroughtime.blogspot.com/2009/09/genesis-of-button-collector-button.html
As you can see by the above 4th and 5th image examples of small ancient coins and the 6th image of ancient buttons here on Earth, raised relief and a rimless design is a typical feature of such small Earth artificial disks. The various samples I've used above were chosen for their variety and rimless designs, irregular edges, and raised relief. They demonstrate that not all such designs depict the visage of a person even though person depictions are the most common and I suspect most viewers will see a face raised relief in the Mars disk evidence in this reporting.
You should also think about this. This object appears to laying free on the base lumpy interior bottom of the shallow pit. It may be laying free of its context geological material now but I doubt that it was originally this way. No doubt this object has been spun around in this shallow pit by both the RAT cutter and both of the RAT metal brushes. Assuming a RAT clockwise spin, it is logical that the disk dislodged from its context material bounced around to the right side of the pit where it lodged against the raised thin ridge line bisecting the pit. The RAT more raised in this right area would have had less contact with the disk allowing to come to a rest even if a bit defaced in the tangle with the RAT cutter head.
So it is also logical to suspect that the origin of the disk dislodged from its context material probably probably originated from the left side of the drilling pit where the RAT was pressed down cutting deeper. So now let's look closer in the image below at the left side of the pit and see if we can see anything else interesting over there.
http://marsrovers.jpl.nasa.gov/gallery/all/2/m/1452/2M255267229EFFAX16P2956M2M1.HTML
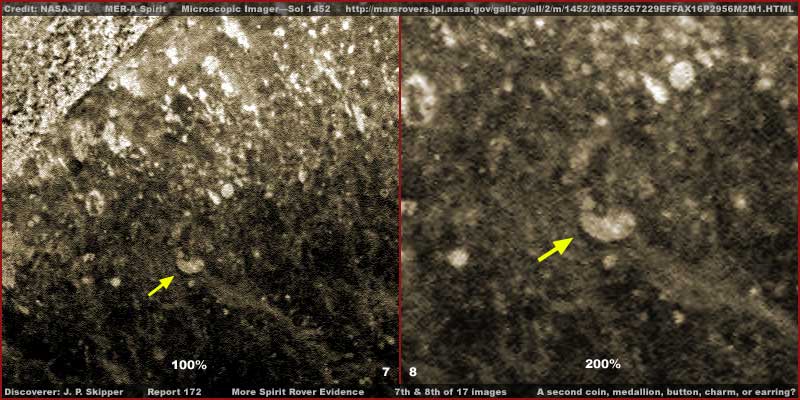
Sure enough in the above 7th and 8th split frame image the left side of the pit reveals some suspicious evidence the chief of which is the disk looking object pointed out by the yellow arrow still partially buried in the matrix. Note in the 8th closer image that there may be a projection object on this disk. This may be an attachment point and so this could be a small charm, button or earring we are seeing the backside of. In fact, it could be a pair companion to the primary disk looking object pointed out in the 1st, 2nd and 3rd images further above.
http://marsrovers.jpl.nasa.gov/gallery/all/2/m/1434/2M253668328EFFAX05P2936M2M1.HTML
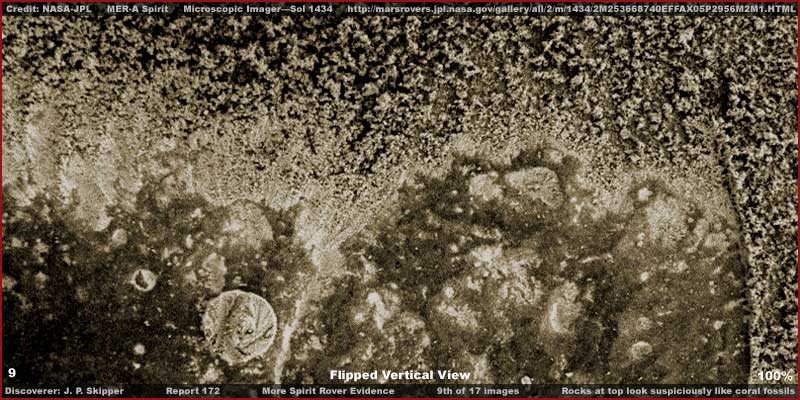
The above 9th image demonstrates a flipped closer view of the right side of the pit area as shown in 1st image. What I want to draw your attention to here is the rock matrix in the top of this image. I've seen this type of rock before in the Florida Keys where I spent 10-years and a lot of exploring. It looks quite a bit like coral fossil rock both as to its top surface and the sides of the rock where it goes down to the pit bottom near the disk like object.
The implication is that this disk looking object may be very old to ancient. If it is a artificially made object as it appears to be, it may have gone to the bottom when shallow salt water covered this area and eventually coral growth in the shallows covered it over sealing it into the bottom matrix. Then long ago the water conditions retreated leaving this in dry terrain to be uncovered by the RAT drilling here in this time.
The only trouble with such musing is that the more distant view of the rock the RAT drilling is presented to us as happening to doesn't look very much like coral rock. This impression is further communicated by the "pocket" and "cavity" look of the bottom area of the RAT drill pit. In fact, the lack of sufficient drilling dust and debris present around the drill site presented to us in the official data even brings up the question of whether the spot documented was even drilled by the RAT. Yet look at the next image below tending to confirm that at least the close in evidence indicates that is is a RAT drilled site.
http://marsrovers.jpl.nasa.gov/gallery/all/2/m/1431/2M253403030EFFAX05P2956M2M1.HTML
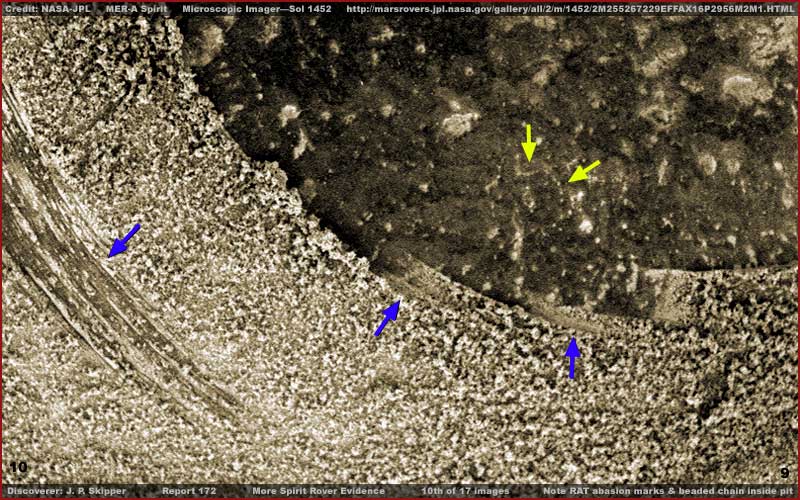
In the above 9th image, note the drill abrasion marks pointed out by the blue arrows at the pit's perimeter areas. This evidence of course tends to support that this is in fact a RAT drilling site. The only problem is that the Microscopic Imager images are always too close giving little away as to the wider site area and the more distant shots by the Panoramic shots are too much visually compromised by poor resolution even though the site is near the rover and the images should be clear. That alone makes me suspicious.
On the other hand, note the evidence the yellow arrows point out in the pit bottom. It looks very much like a section of a very small beaded chain doesn't it. Could the disk evidence here be associated with charms on a beaded chain that someone in the ancient past wore? That's very powerful suggestive visual evidence ripe with implications isn't it.
http://marsrovers.jpl.nasa.gov/gallery/all/2/p/1408/2P251359416EFFAX00P2433L4M1.HTML - left panel
http://marsrovers.jpl.nasa.gov/gallery/all/2/p/1431/2P253399517EFFAX05P2564L4M1.HTML - right panel
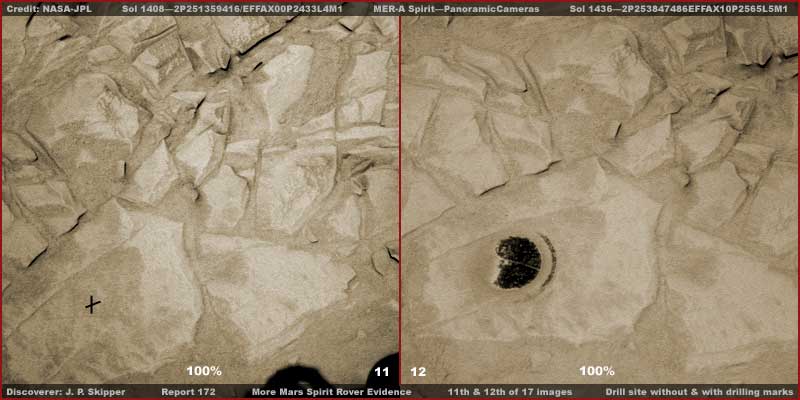
As you can see in the above 11th and 12th side-by-side images, the left panel shows the rock in question without any drill marks on it on Sol 1408 while the right panel shows the same rock on Sol 1436 some 28 days later with the RAT drill marks in it and the pit bottom now fully exposed. Note the straight light color line bisecting the pit and the reflectivity of the round disk on the left side of the pit confirming this as the site.
I didn't have the image room to show it here but I urge you to access the above second link for the right panel and look at the larger field of view of the official image the above right panel was sourced from. It will show a portion of the rover in the bottom of the frame completely with JPL labeling. Remember that the drill hole is suppose to be "nearly 5 cm or 2 inches in diameter." Using the rover as a frame of reference, doesn't that dark color drill pit look a lot larger than that to you? It certainly does to me.
http://marsrovers.jpl.nasa.gov/gallery/all/2/p/1431/2P253399517EFFAX05P2564L4M1.HTML
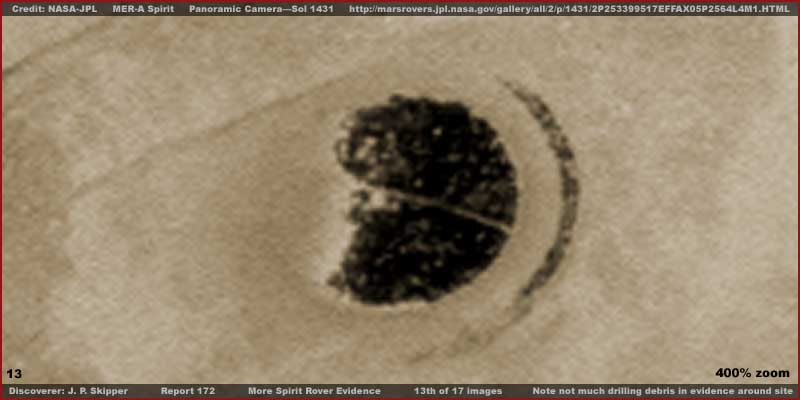
The above 13th image demonstrates a 400% closer view of the drill site in question here as viewed by the rover panoramic camera. Note how vague and blurry the terrain around the drill pit looks even though the camera is only a short distance from the target. Because the resolution is so poor and blurry, it's hard to tell but note that there really doesn't seem to be any piling up of drilling dust and debris around the drill pit. I find this suspicious and it causes me to suspect but can't prove that the drill pit surroundings do not belong with the drill pit.
You should know that just a few feet away are two other drills sites not to be confused with the drill site reported on here. Neither demonstrate this coral rock appearance geology. The makes me suspicious that maybe the above more distant view is not real? That kind of suspicion makes it easy to speculate and consider questioning whether the true drill site is on the edge of some body of water evidenced by the coral rock structure and maybe the above individual rocks shown by the panoramic camera are not the true drill site?
Now take a look now at the following images that will help bring you up to speed both as to the RAT itself, its drilling features, and the typical drill site look. Note that the RAT is developed and operated by Honeybee Robotics here in the USA.
http://www.hbrobotics.com/rat.html
http://athena.cornell.edu/the_mission/ins_rat.html
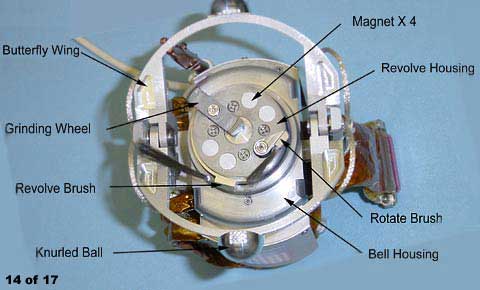
The above 14th image demonstrates the business end features of the RAT. Note in particular the small cutter/grinding wheel and the small brush that rotates with the grinding wheel designed to sweep out the interior of the drilled pit. Note also the larger longer brush that rotates on an outer housing designed to sweep away dust and debris around the drill hole. Note that both the inner and outer brush orientations confirm a clockwise rotation when pointed down at the ground.
http://athena.cornell.edu/the_mission/ins_rat.html
http://www.hbrobotics.com/rat.html
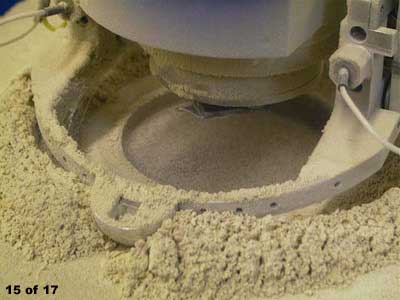
The above 15th image demonstrates a typical rock drilling which in this case is limestone and in a lab setting here on Earth. Note how much dust and debris is generated by a typical rock drilling. Note that the outer position metal ring limits how far away the outer brush can push away the dust and debris where it piles up outside the positioning metal ring.
http://athena.cornell.edu/the_mission/ins_rat.html
http://www.hbrobotics.com/rat.html
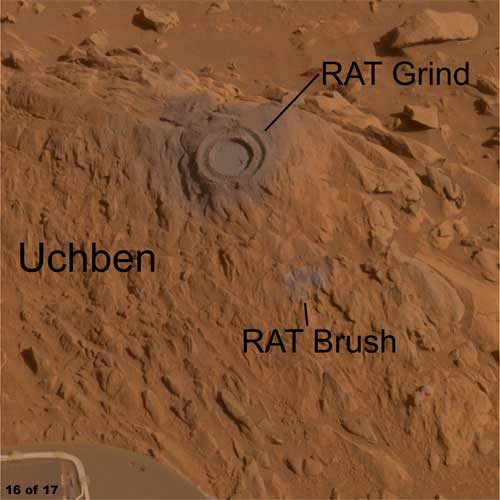
The above 16th image demonstrates two kinds of drilling on Mars at another site not associated with this one. The top one is the full use of the RAT drilling a pit. Note the clear piling up of the dust and debris with the clear imprint of the outer position metal ring in that dust and debris. Note that to the nearby lower right of that drill site is a spot where only the RAT brush was used to sweep off a spot. As you can see, this last use of the RAT demonstrates that a delicate touch in the drilling process is apparently possible with this tool. These are examples of what the two principle RAT drillings generally look like for your reference.
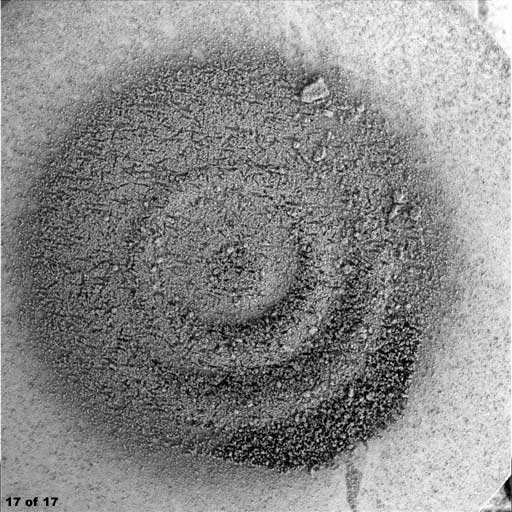
http://marsrovers.jpl.nasa.gov/gallery/all/2/m/1355/2M246651970EFFAVQWP2956M2M1.HTML
However, the context views of the drill site in question here show a RAT downward pressure off balance deeper on one side and nearly non existent on the other side. Likewise, the drill site under question here appears to be free of perimeter dust and debris that should be there. In other words, the deeper and more careful one looks, the more inconsistencies one finds. Again, these inconsistencies tend to bring up questions as to whether the wider field of view context panoramic camera images supposedly of this drill site and the terrain around it are truly the same as the Microscopic Imager images.
I suspect they aren't but can't really be conclusive about this. For example, it may not be but it is possible that the rover repositioned its articulating arm becoming more offset in drilling this hole deeper after the above drilling progress was imaged. Also, it is possible that those operating the RAT and the articulating arm the RAT is on may have a delicate enough touch to use the RAT larger brush to move around the site sweeping off a wider area around the drill hole to make the accumulating dust and debris around the hole visually go away.
I keep thinking about that coral looking rock presence. If you were a secrecy type operating the rover around a body of water that produced coral evidence in older times in the older shore areas now retreated away from, you would not be showing that in the wider view context imaging and would be substituting something else visually to obfuscate the reality. Likewise, if you encountered an old long ago decomposed corpse and a pocket near it with some shiny objects in it, you might just stick your rover articulating arm down there and dig around.
The Microscopic Imager very close views would not show any unacceptable information further than 3-inches outside the hole but the panoramic camera would and would have to be dealt with. Just a thought. Yes, I'll admit it, I'm not much for accepting things at face value and especially when I suspect someone is trying to get something by me.
By the way, don't come back to me and point out all of the other objects in this drill pit that might be artificial. I am aware of them but I report only on what I consider the most obvious and strongest evidence that I believe that most viewers can see and recognize as is my way. The rest is more interpretive and up to individual perception.
Joseph P. Skipper, Investigator
From: Mars Anomaly Research
http://www.marsanomalyresearch.com/evidence-reports/2009/172/spirit-rover-evidence.htm



No comments:
Post a Comment